

Issue 1, Happy New Year
Issue 1, Happy New Year
and welcome to the Freeform Yarny Things newsletter

Hey Everybody,
Thanks so much for subscribing to Freeform Yarny Things. Over the past few months, I’ve been actively working to establish a daily practice for my creative projects. Waiting for inspiration to strike isn’t a dependable way to get things done, but consistently sitting down at my work table is. Settling into my routine is an ongoing process, and it’s likely to always be somewhat fluid. Making this newsletter as part of my creative practice in 2023 is a way for me to stay in touch with people who are interested in creative fiber projects, to share ideas and information, to get into the habit of reviewing and evaluating what I’ve been working on, and to follow through with my works in progress.
What’s Been Going On
Starting a new year always makes me want to go back and look at my knitting and crochet projects from the old year. There weren’t too many freeform projects in 2022, but there was lots of swatching for stitches and techniques that might go into future freeform projects.

Towards the end of the year I had some pattern writing to do, which left less time for actual knitting and crocheting. So, small projects seemed to be the way to go. These overlay crochet coasters in the Geometry and Texture MAL from Lillabjorn were a perfect project for learning a new technique. Plus, they work great as pin cushions with a couple of final rows omitted and a simple circle of single crochet stitches for the back. The tapestry needles that have been collecting on my work table now have a home, and I have a functional souvenir to remind me to find ways to use this crochet style in future work.
This photo of the colors of the moon from photographer Marcella Giulia Pace makes me wish for a mini skein collection dyed to match. Nature has been an inspiration for artistic endeavors as long as there have been artists, and I’m hoping that somewhere there’s a talented yarn dyer who loves this photo as much as I do.
This design from 2020 has been calling out to me, it might be time to make another.


If you like fading from one Malabrigo yarn colorway to the next in a knitted cozy wrap, this may be a good winter project for you.
Artist Spotlight
Finding artists to love is one of the reasons I enjoy using social media, and finding Amy Genser’s page was a real treat. She takes special papers and rolls them up into logs, then she cuts the logs into slices and uses those slices to make really gorgeous wall pieces and 3D sculptures. Here’s a photo from her Instagram.

Scroll through her IG or click over to her website for more eye candy. I’m hoping to get to see her work in person sometime.
Classes coming up at the Carolina Fiber Fest


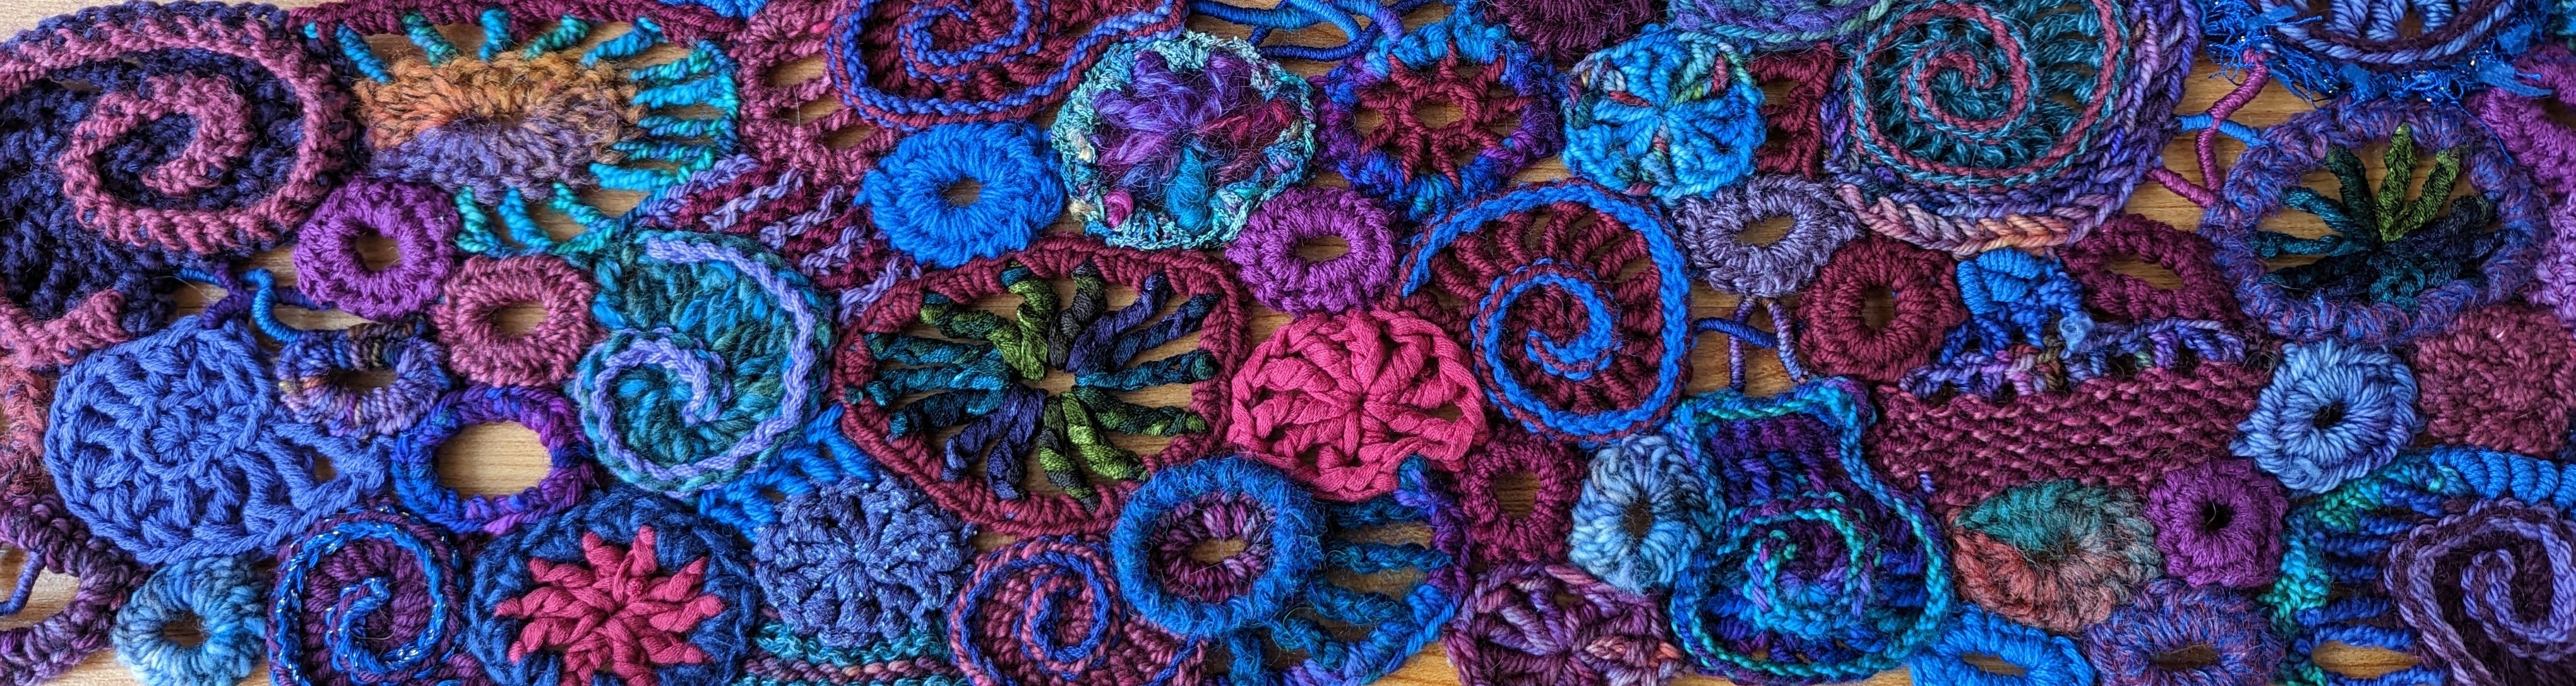
Last fall I finished a little freeform shawlette for an upcoming class at the Carolina Fiber Festival, and now the pattern for the workshop guide is almost complete. Freeform Favorite Shawlette will be the first in a series of designs that will teach freeform crochet through actual projects.
In my experience with teaching knit and crochet classes, it seems that most people like project classes more than technique classes, so I’m developing a number of these projects for teaching. Each design will feature a handful of freeform components, and most will have a plain section in addition to the freeform section (like the Freeform Favorite Shawlette), making them more approachable. All designs will address artistic concepts that will allow crocheters to move beyond these patterns/guides and bring their own ideas into their projects.
If you are within reasonable traveling distance to Raleigh, NC, check out the Carolina Fiber Fest website for their rather extensive selection of classes.
A Small Project for Subscribers
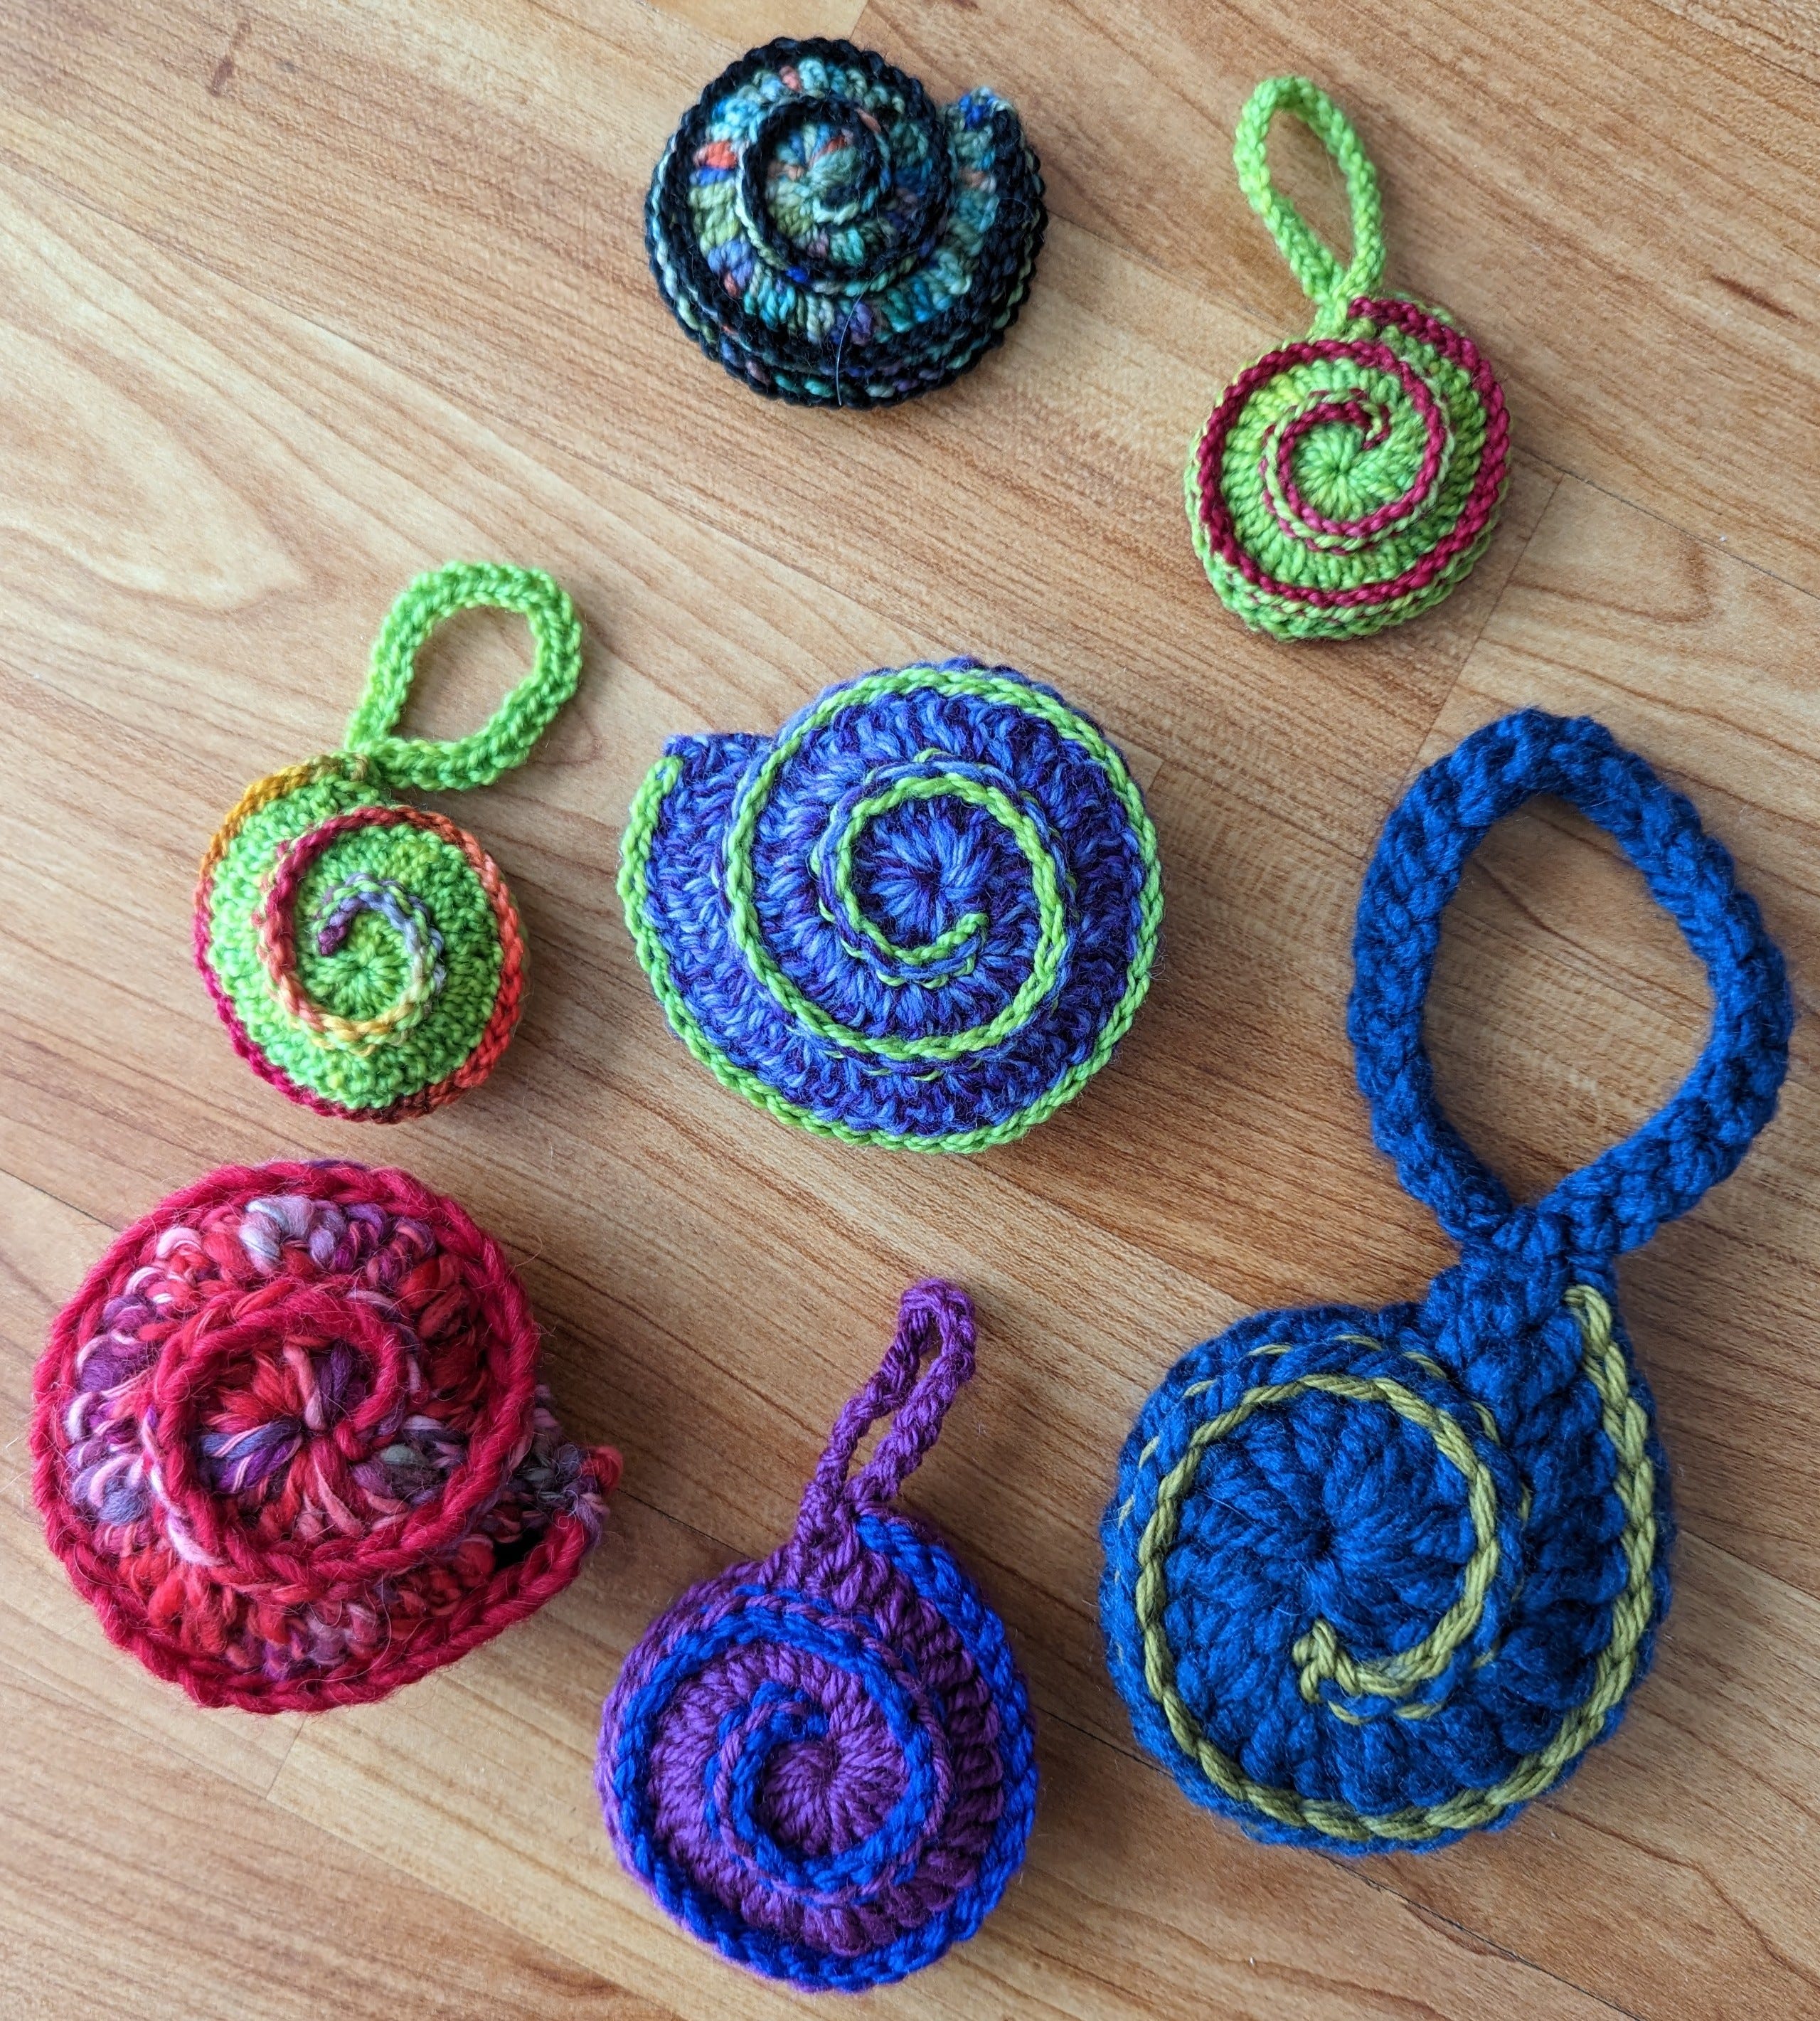
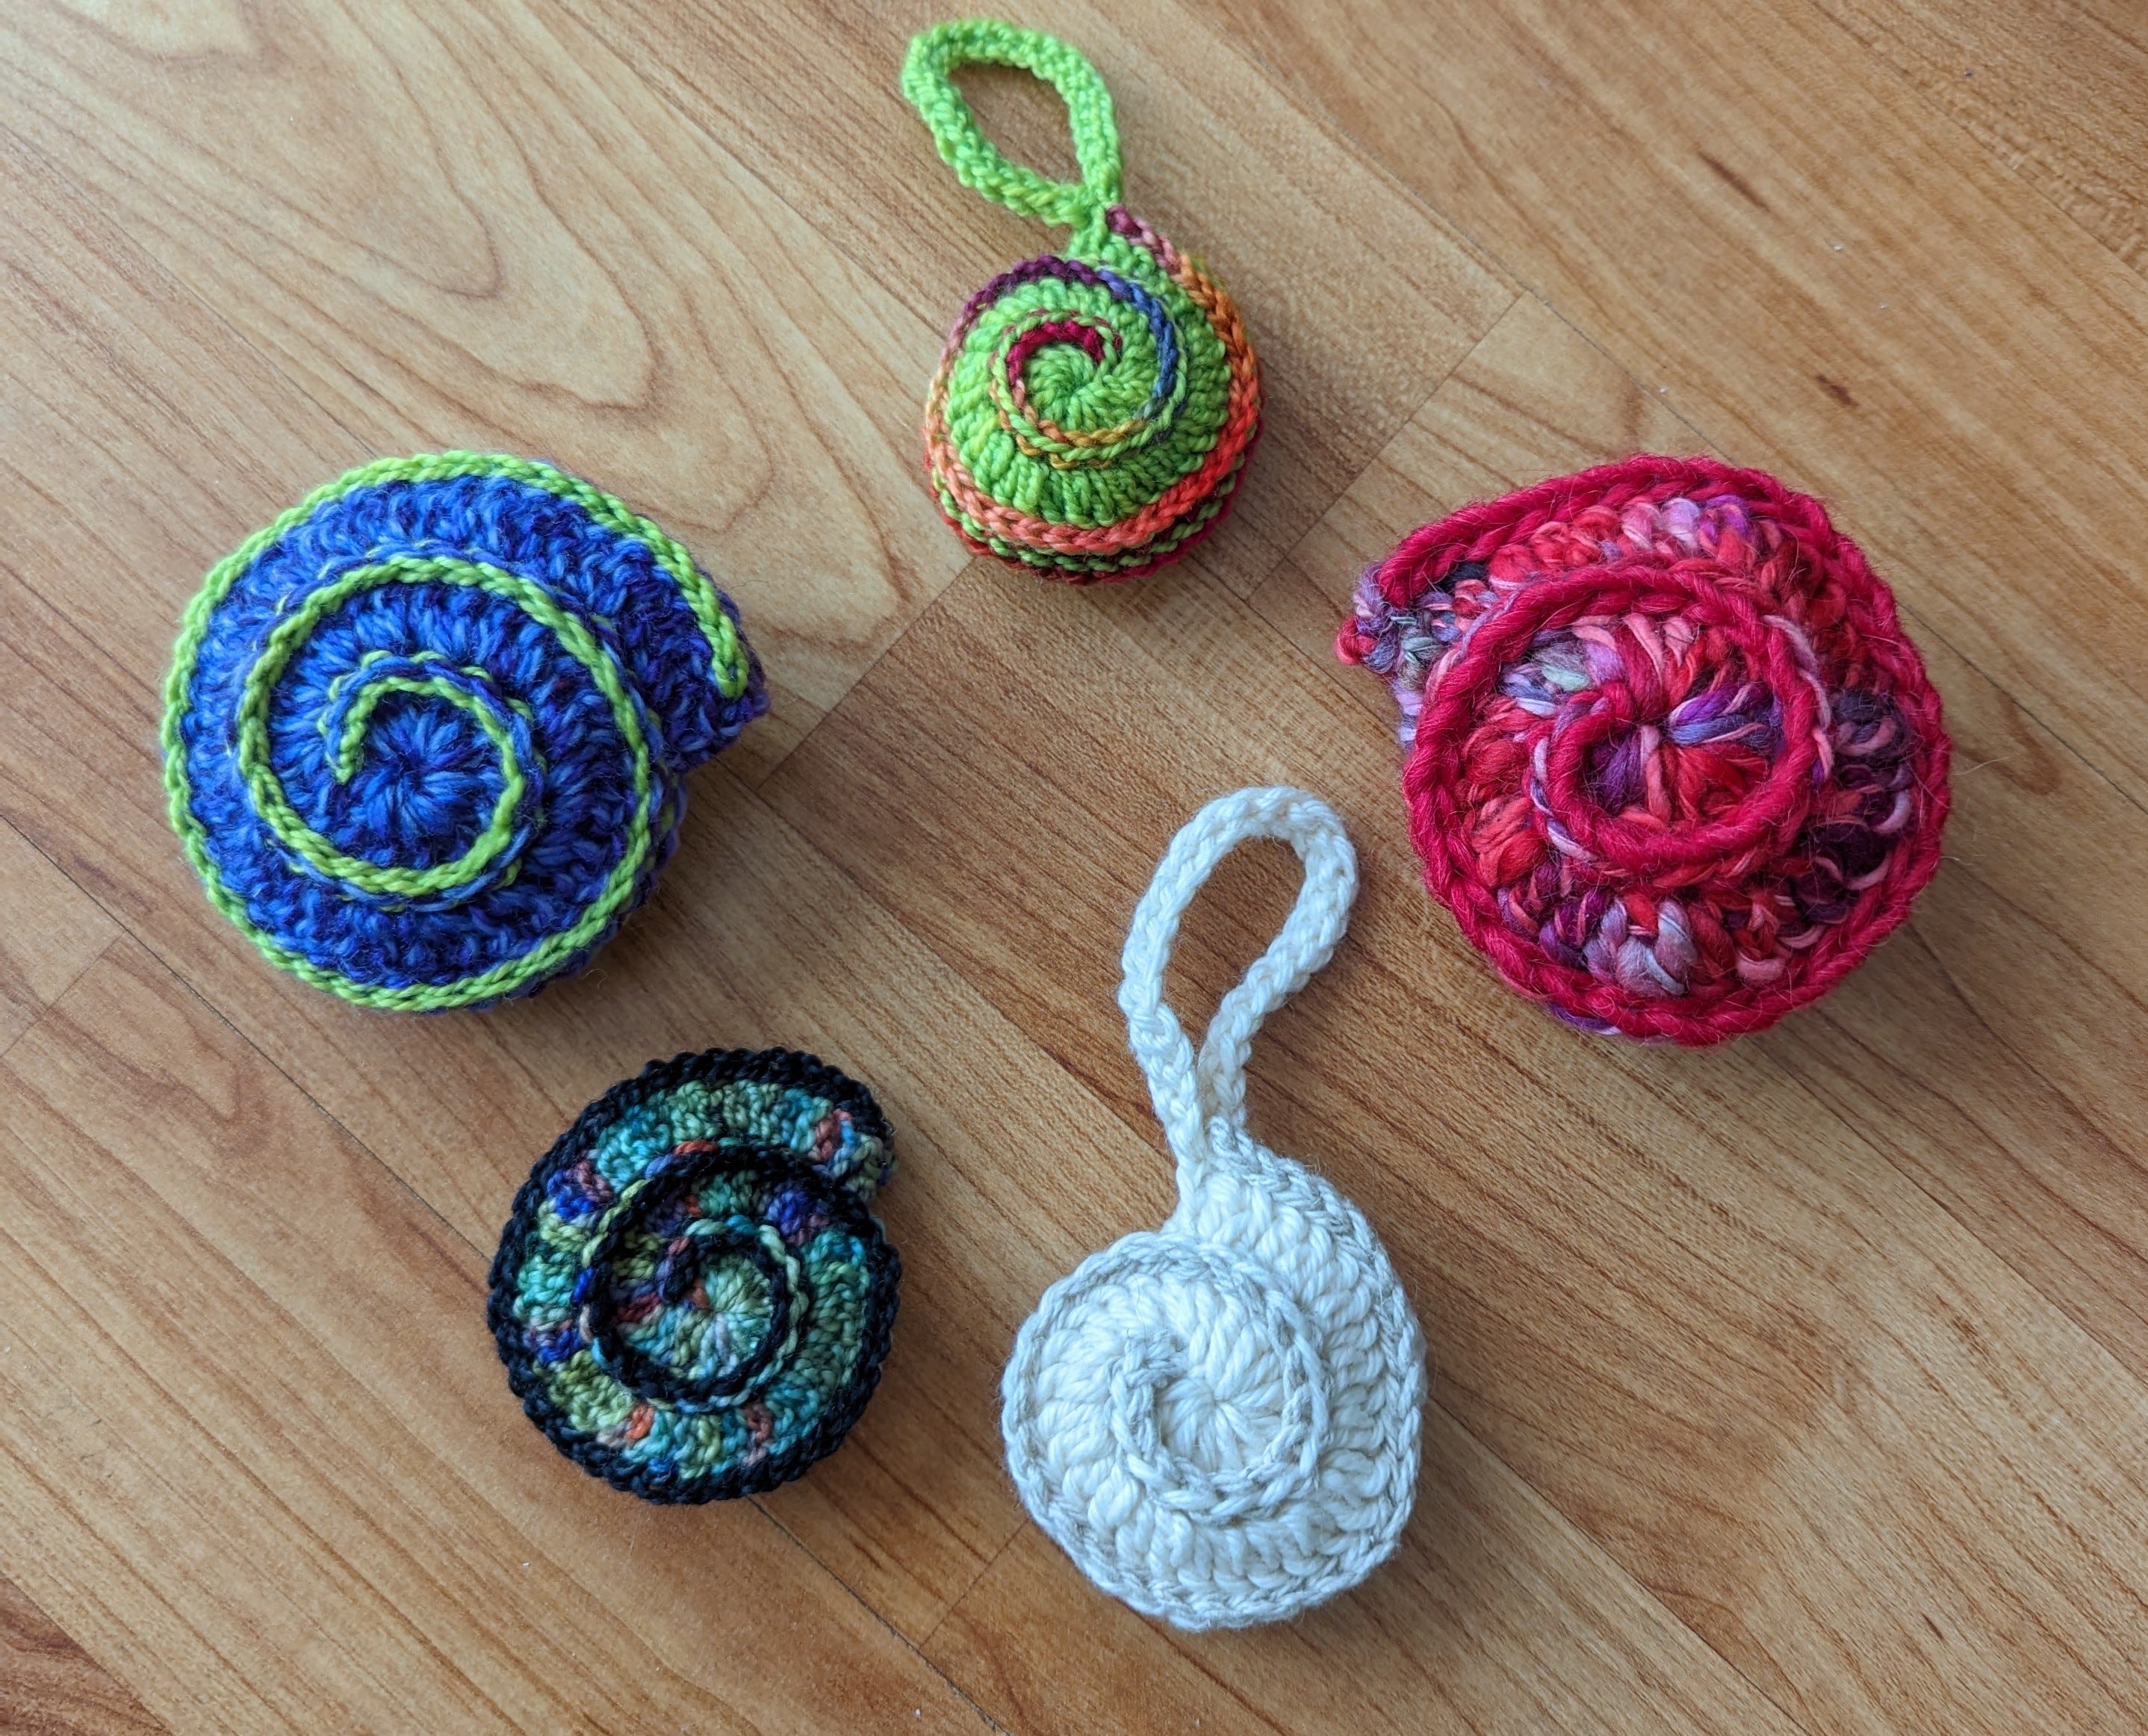
I mentioned earlier that I did some small projects towards the end of last year to leave time and brain power for pattern writing. These spiral baubles were the smallest of the small! Simply made, they’re two spirals sewn together to make them more substantial and keep the wrong side from showing. Add a loop and you have an ornament or a luggage tag. Skip the loop and add some stuffing and you have a pin cushion or a cat toy. I wrote up a tutorial in case any newsletter readers were in the mood for a tiny little project.
3/24/23 edit: Note: if you just want to learn to make a spiral, follow these instructions through the spiral embellishment section, and ignore the part about the second spiral.

SPIRAL BAUBLES
Tips to know before starting:
Finish the surface embellishment on each spiral before joining the spirals together, otherwise it’s a pain.
Don’t weave in any of the tails. Really! Take them to the wrong side of the spiral, but then just leave them. The long one will be used for joining, and the others can be used between the spirals for padding.
If you plan for both of your spirals to use the same yarn for the background, then your whip stitch seam will blend in almost invisibly.
For the second spiral, we’re using the wrong side as the public side. That way, when the two spirals are sewn together, they mirror each other for a perfect fit. Pay close attention to the instructions for the differences in making the second spiral just so everything works out the way it needs to.
Ok, now here’s what you’ll need to make the spiral baubles:
20g (approx) of leftover yarn for the spiral backgrounds
7-8g (approx) of contrasting yarn in the same weight or slightly lighter for the embellishments
Hooks that are slightly smaller than the size recommended for the yarns you are using. I like the spirals to be fairly firm since I’m sewing them together and using them for decoration. Using a smaller hook will give a firmer fabric. If you don’t know what size hook is recommended, make a good guess and see how you like it.
Tapestry needle for joining
optional polyfil or yarn scraps for stuffing
Bauble Instructions
With a plain yarn, ch 4, sl st in the first chain to make a small ring. Ch 2, work 11 dc into the ring. The circle will look almost but not quite full. Find the ch-2 from the beginning of the round, and instead of counting it as a dc, you’re going to work sts into it. Work 2 dc into each of those 2 chains. Next, working into the back loop only of the dc stitches, work 2 dc in each st over the next 10 stitches.
At this point, you can stop right there (or even earlier if you prefer), or you can keep going to make the spiral larger. If you keep going, you’ll need to judge whether you need to work 2 dc in each stitch, or just 1 dc. Making the right choice about this determines whether or not your spiral will lay flat, which is what you want it to do. Here’s how you do it: work a dc into the next stitch, then look at the dc you just worked and decide if it’s standing up straight (when compared to the stitch directly below it) or leaning to the right. If it’s standing up straight, go on to the next stitch and make your next dc. If it’s leaning to the right, work another dc into the same stitch as the last dc. Keep doing this (it gets easy to eyeball it once you get going) until the spiral is as big as you’d like it to be. This is the trick freeform crocheters use when they want the fabric to lay flat, and this tiny project is a good place to learn it and practice it if you haven’t done it before.
When you’re happy with the size of your first spiral, stop working dc stitches and start working chains to make the loop for hanging. Make the chain twice as long as you’d like the loop to be, for instance, 5” for a 2.5” loop. Then, skipping the chain closest to your hook, work a slip stitch into the rest of the chains. You’ll secure the end of this row of slip stitches as you join the two spirals together later on. Leaving a 20” tail for joining, cut the yarn and fasten off.
Embellishment for the spiral: Since you’ve worked into the back loop for all of your stitches, the front loops are easily visible. Attach a contrasting color of yarn by working a slip stitch into the front loop at the center of the spiral, then work a slip stitch into each of the front loops going all the way to the last dc of the spiral. Fasten off. Use a tapestry needle to take both tails to the back of the spiral.
For the second spiral, use the same instructions as the first, with one big exception. We want to use the back of this particular spiral as the right side, so we want the loops for the slip stitch embellishment to end up on the back of the work. So, when the instructions say to work 2 dc stitches into the 2 chains, work into the left loop of the chain instead of the right loop like it’s usually done. And, where the instructions ask you to work into the back loops only, do the opposite and work into the front loops only. The point is to make this spiral a mirror image of the first one, so that they sew together nicely. When the second spiral is the same size as the first, fasten off, no need to make another loop for hanging. Also, no need to leave a long tail for joining, just leave a 4-6 inch tail, as you usually do.
When you’re working up the embellishment, you can start at the center like you did for the first spiral, or start from the outside and work the slip stitches until you get to the middle. I found that working from the outside in was my favorite.
Finishing: Put the spirals together with wrong sides facing, making sure all the tails go towards each other.
Using the long tail of the first spiral, sew the motifs together with a simple whip stitch join. If you made the row of slip stitches for the loop, fold it over so that you can catch the end as you work the whip stitch join. Be sure to capture the tails between the motifs before completely finishing the join, adding a little stuffing if you wish. Tie a knot in the joining yarn as close to the bauble as possible, then take the tail to the inside. Even though you can’t see into the inside of the bauble (since it’s sewn up now), try to guide the tapestry needle into the backs of some of the stitches to secure the tail a little bit. Pull the tapestry needle back to the outside of the bauble, pull the tail a little bit tight, and cut it 1/4 from the bauble. When you release the tension, the tail will recede back into the center of the bauble.
This has been an awful lot of words for such a small project, but after you’ve done your first one, you probably won’t have to refer to the directions for the next, at least not every word. And if you haven’t tried freeform crochet before, now you can do a very popular motif that you’ll be able to use in your future projects.
A few more things you might like….
If you’re a fan of freeform crochet, you might enjoy seeing Lindzeanne’s freeform embroidery.
Sue Maton is a crochet designer who teaches very detailed online classes for her gorgeous patterns at The Mercerie.
This delicious recipe for gnocchi with burst tomatoes and mozzarella uses grocery store refrigerator gnocchi and it’s super simple. It’s great for a quick weeknight dinner.
Thanks for reading,
Lisa
P.S. If you know someone who might enjoy this newsletter, feel free to forward it to them. And if someone forwarded this newsletter to you, I hope you’ll hit the subscribe button below so the next issue will come right to your own inbox.